
Commonwealth Call-For-Fire
Step 1 : Set VBS3Fires doctrine in Toolbar > Options > Preferences > Doctrine Tab > select ‘Commonwealth’, then click ‘Save”. After saving the doctrine, all missions will use the British Commonwealth format.
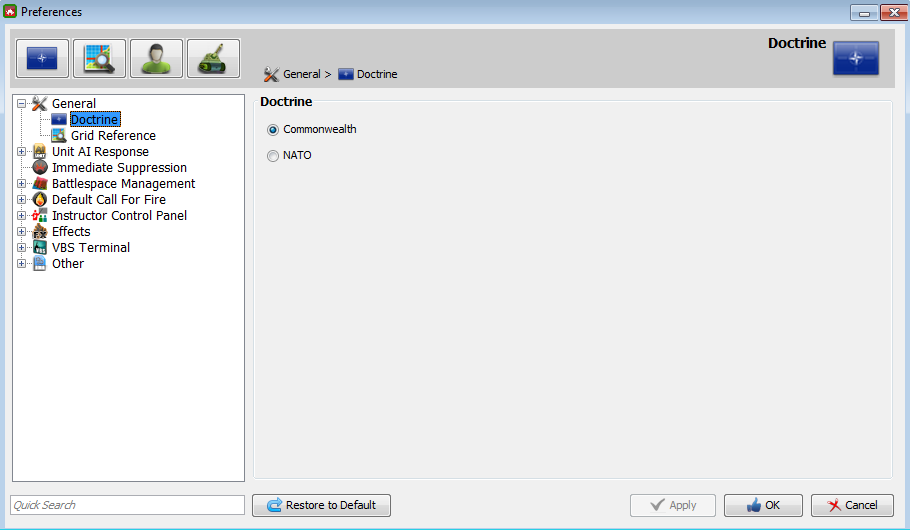
∆ Image M20: Call-For-Fire (CmnWth) VBS3Fires Preferences Window |
Step 2: The following windows are optional but provide an instructor or controller additional information on a mission. The radio log will list all messages to and from VBS3Fires and the observer. (Toolbar > Radio > Radio Log). Projectile analysis will list all rounds fired by VBS3Fires (Toolbar > Analysis > Projectile Analysis). These windows can be repositioned within the VBS3Fires workspace.

∆ Image M21a: Call-For-Fire (CmnWth) Projectile Analysis window |
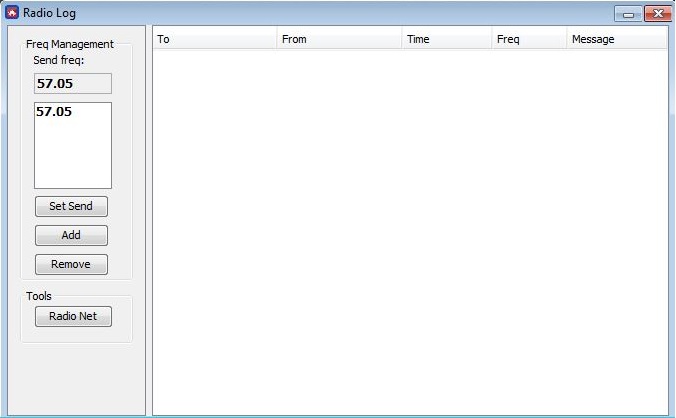
∆ Image M21b: Call-For-Fire (CmnWth) Radio Log window |
Step 3: Start a new mission, Toolbar > Fire Mission > New Fire Mission to open the Fire Mission Selection window. Select firing asset '20' and number of guns to fire, default is BTY (battery) and click the 'Transmit' button.
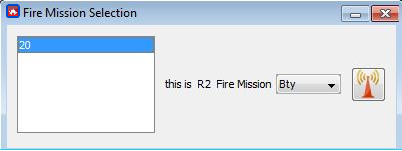
∆ Image M22: Call-For-Fire (CmnWth) VBS3Fires Fire Mission Selection Window |
Note:
Once you clicked the transmit button, new entries
will appear in the 'Radio Log' window. There are two transmission entries made
in the radio log. One is the transmission from the observer to fire asset and
the other is the response from the fire asset.
Step 4: The Fire Mission window will open. Click the 'Target' Tab and enter the target's location '10888554' and click the 'Transmit' button.
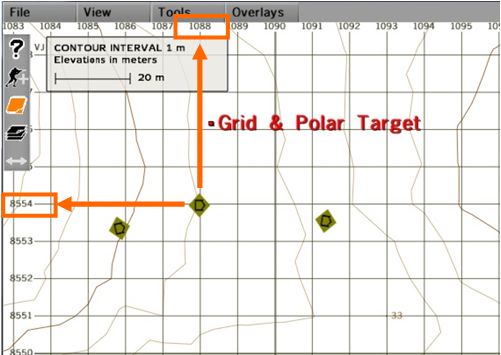
∆ Image M23: The Grid and Polar Target label in the RTE View |
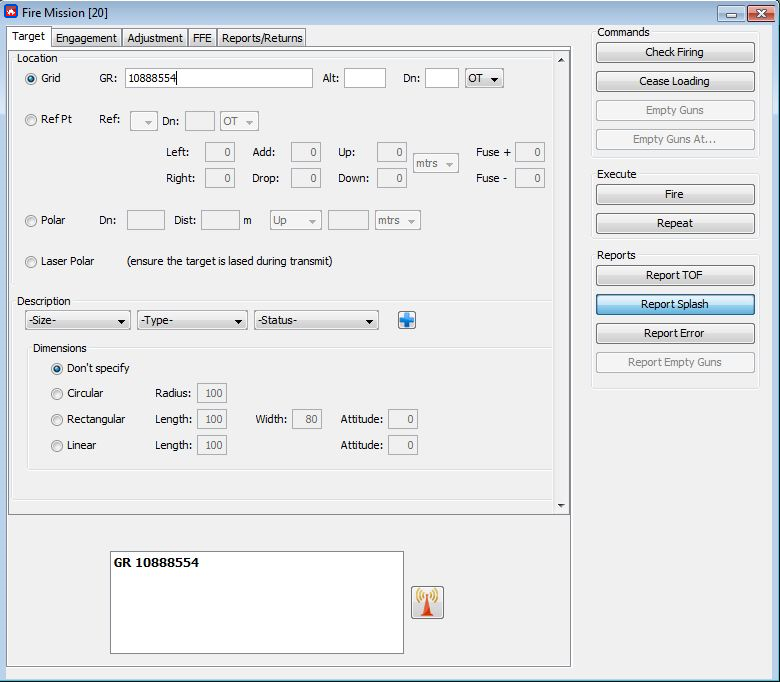
∆ Image M24: Call-For-Fire (CmnWth) Fire Mission window, Target Tab |
Step 5: Click the 'Engagement' Tab to change call for fire elements such as Trajectory, Distribution and type of ammunition. Default values are low angle, circle 50m, and high explosive with quick (point detonation) fuse. If you select any values, click 'Transmit'
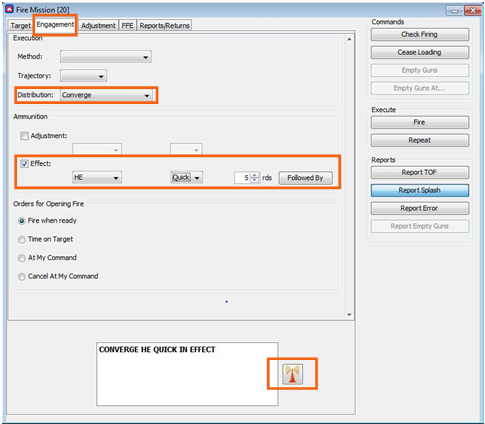
∆ Image M25: Call-For-Fire (CmnWth) Engagement Tab |
Step 6: Click the 'Adjustment' Tab. Make sure 'Adjust Fire' is selected in upper left, and click 'Transmit' One round of HE/Quick will be fired at the grid entered in the 'Target' Tab
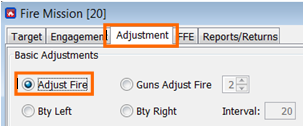
∆ Image M26: Call-For-Fire (CmnWth) Execute an adjust fire mission |
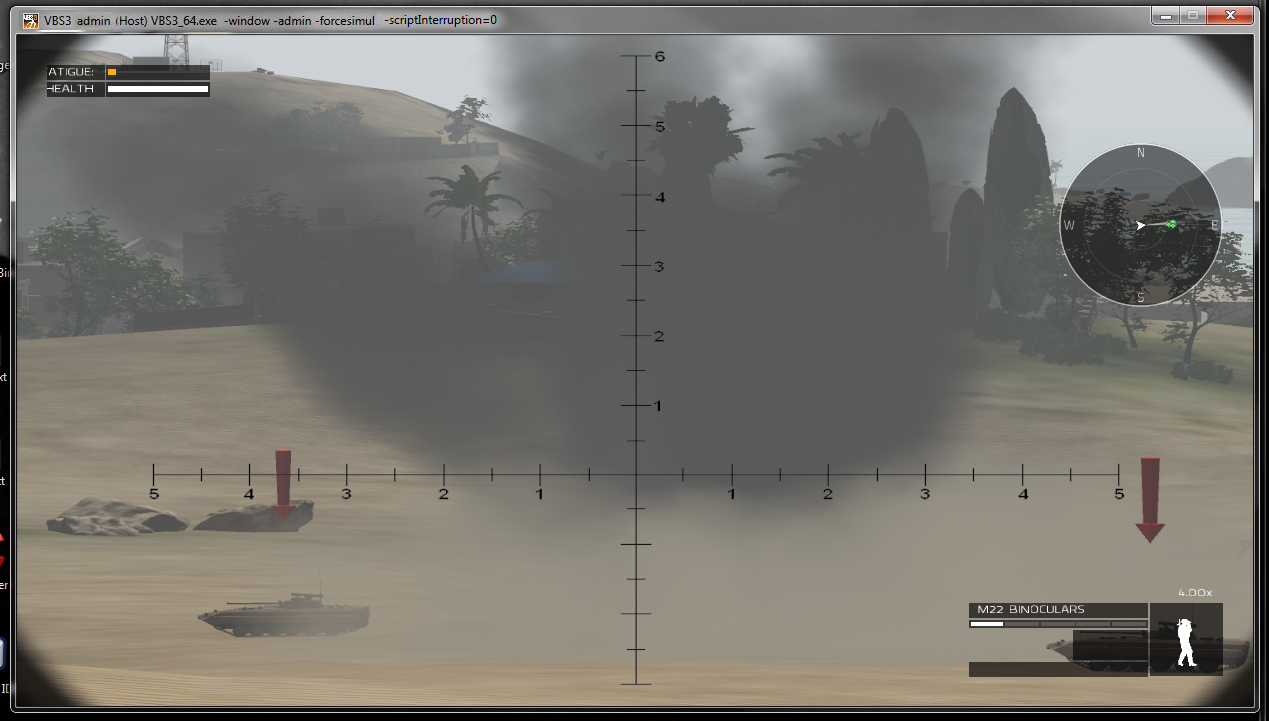
∆ Image M27: Call-For-Fire (CmnWth) Adjust Fire impact |
Step 7: VBS3Fires will calculate the firing data. In the Radio Log window, all message traffic will be displayed, in Projectile Analysis a list of rounds fired will appear.
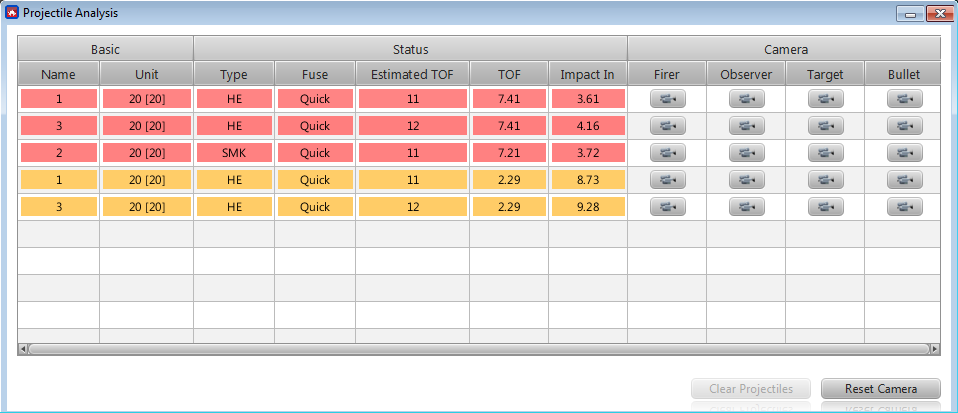
∆ Image M28a: Call-For-Fire (CmnWth) VBS3Fires Projectile Analysis Window |
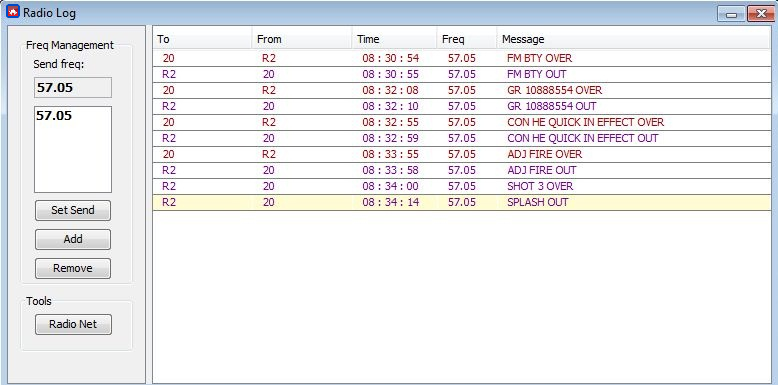
∆ Image M28b: Call-For-Fire (CmnWth) VBS3Fires Radio Log Window |
Messages and projectiles that are highlighted YELLOW have been transmitted or fired within 15 seconds. In the Projectile Analysis window, rounds will be highlighted RED 5 seconds to impact. RED TEXT means round has impacted.
Step 8: Adjustments are entered in the 'Adjustment' tab. Enter values in the correct field to move the round left/right, add/drop, and up/down. Click 'Transmit' when complete.

∆ Image M29: Call-For-Fire (CmnWth) Enter adjustments |
Step 9: To change the mission from Adjust Fire to Fire for Effect, click 'FFE' Tab in the Fire Mission Window. Make sure 'Fire For Effect' is selected, and then click 'Transmit'.
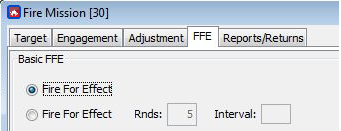
∆ Image M30: Call-For-Fire (CmnWth) VBS3Fires FFE tab |

∆ Image M31: Call-For-Fire (CmnWth) VBS3 Target after impact |
Step 10: To end the fire mission go to the 'Reports/Returns' Tab and press the 'End of Mission' button.
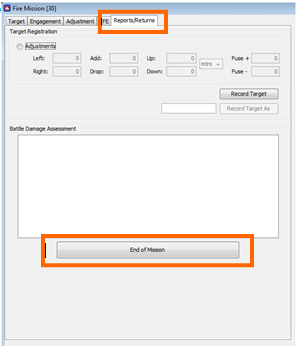
∆ Image M32: Call-For-Fire (CmnWth) Reports/Returns tab, End of Mission |