($title$)
The ‘Engagement’ tab is used to specify the method of execution, select ammunition and provide orders for opening fire

∆ Image 3c: Engagement tab window |
The Method drop down box allows the observer to specify any particulars relating to this Fire Mission. By default this box is blank, and the method text will only be aded to the transmission if a non-blank value is selected. These values can include:
- Danger Close
- Mark
- Registration
- Laser Registratoin
- Sound Adjustment
- Witness Point
The 'Tragjectory' drop-down box allows the observer to specify the trajectory of the rounds. These trajectories can be low angle or high angle. By default the box is blank and, in most cases, this will result in a low angle trajectory being selected by the guns. Notable execptions are motar fire and field guns when firing Excalibur rounds, where high angle is the default trajectory.
The 'Distribution' drop-down box specifies the disctribution of rounds which will be fired by the guns. By default this is blank, which normally will result in a concentrated distribution from the guns. Some of the distributions allow for the entry of additional paramenters, such as radii and distances. If these options are available, text boxes will appear when the relevant distribution is selected. The supported distributions are:
- Concentrated. All guns will fire at the same point.
- Circular. Guns will fire so that their rounds land on the perimetre of a circle of a specified radius. A text box will appear to enter the radius.
- Linear. Guns will fire along a line of specified length and attitude. Text boxes will appear for the length and attitude of the distribution. The length corresponds to the total length of the line, not the space between individual rounds.
- Open. Guns will fire along a line of fixed length. The line will be perpendicular to the GT line
- Lines of Fire Parrallel. This is where the fall of shot of the guns mirrors the physical layout of the guns on the ground. The guns all fire on parrallel trajectories.
- Lateral Spread. This is used predominently for illumination. It results in rounds falling left and right of the target from the observer’s perspective. As more guns are added, the extra rounds fall further from the target.
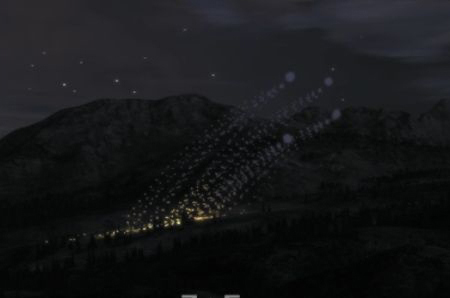
- Range Spread. This is predominemtly used for illumination. It results in rounds falling forwards and backwards of the target from the observer’s perspective. As more guns are added, the extra rounds fall further forwards and backwards from the target.Please refer the Appendix 15 for more information.
- Range and Lateral Spread. This is predominently used for illumination. It should not be used with less than four guns firing. It involves firing rounds in a star formation around the target, effectively overlaying a range spread on top of a lateral spread.
- End Point Linear. The distribution takes a linear shape along a line of specified length and altitude. Text boxes will appear for the length and attitude of the distribution. The first round will impact on the target and the others will be impacting in a linear distribution, away from the target with a calculated angle.
- Circular Sheaf. Guns will fire so that their rounds land on a circular formation with one gun in the centre of the circle making the entered value the diameter of the cirlce. A text box will appear to enter the diameter. For example: If only one gun fires it should fire on the target. If the given value is 200m with four guns, three rounds should explode in the perimeter of the circle and one round should impact in the center.
- Rectangular. The rounds will impact on a rectangular distribution with the prefered dimensions of the user. Text boxes will appear to enter the Length(m), width(m) and the attitude in mils.
Ammunition selection
Users are able to select ammunition and fuses for the guns to fire from this portion of the interface. Users can select a specific ammunition type for the adjustment phase, and/or specific ammunition for the FFE phase. Alternatively, the user may select an ammunition type which will be used in both phases. To select an ammunition type for the adjustment phase, ensure that the adjustment check box is ticked and then select the user's desired ammunition from the list. Relevant parameters will appear for certain ammunition and fuse choices.
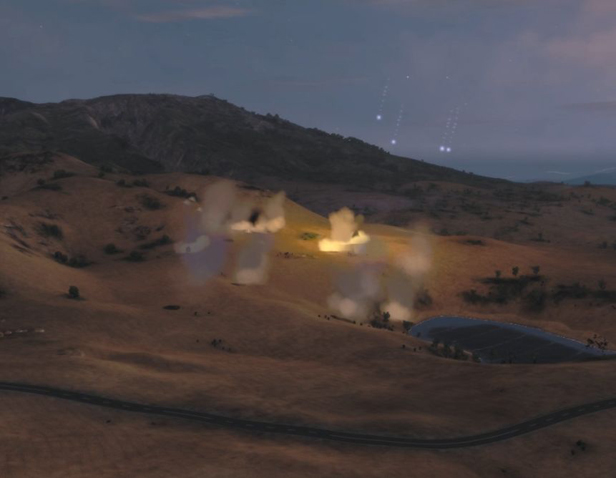
∆ Image 3d: Fire mission rounds exploding in the VBS3 environment |
To select an ammunition and fuse for the FFE phase, ensure that the 'Effect' check box is ticked and then select the relevant ammunition and fuse from the available options. Additionally, the observer has the option of selecting a number of rounds. This is for preparation purposes only and does not affect the number of rounds the guns will fire. Rather, it warns the guns that they will need to prepare that many rounds for the fire mission.
∆ Image 3e: Fire mission rounds exploding in the VBS3 environment |
Similarly, the user may click the 'Followed By' button to inform the guns
they need to prepare a different type of ammunition and fuse for later in the
mission. Again, selecting ammunition in this phase will not result in a round of
that type being fired.
The Adjustment check box will be selected by default as you proceed to the Engagement tab. Either Adjustment or Effect should be selected for gun preparation transmission. Both mechanisms cannot be transmitted at once. However once the adjustment fire details are transmitted and confirmed the Effect details can be transmitted. The transmitted fire mission data will be used for each Adjustment and Effect missions respectively.
The round types available are:
- HE
- WP
- Smoke
- DPICM
- APICM
- CPHD
- EXCALIBUR
- ILLUM
Fuse selection
As well as selecting the ammunition type, the Fuse may also be specified. Any fuse may be chosen for any ammunition type; however, some fuse / ammunition type combinations will be ineffective. For example, calling a DPICM round with a Quick fuse will cause minimal damage in the impact area. The options for fuses are:
- Quick
This is a point detonating fuse. There are no parameters to specify with this fuse selection.
- Timed
This is a fuse that will explode a certain number of seconds after being fired. The fuse time is specified in meters above sea level. When this value is specified, the FDC / Bty GPO will conduct the ballistic analysis and will turn that distance into a time of flight. The guns will then use this time of flight to ensure that the rounds detonate at the correct moment. This will be 200m by default.Ammunition exploded by Timed should land their sub-munitions around the target. For an example: Smoke timed in Commonwealth doctrine, the sub munitions should detonate on the projectile path and head towards the target. In Nato doctrine the rounds should explode above the target and follow the projectile path and hit the ground further away from the target.
- Variable Timed (VT)
This fuse will explode the round when it is a specified distance from the ground. The round has a sensor at the front that is able to use Doppler shifting to determine how far it is from the ground (or building or other object). VBS3Fires will detonate the round if it ever passes closer to the ground than the specified fuse setting. Normally this value is several meters (9m by default); however, VBS3Fires does not restrict the value of this fuse setting. The parameter specified for a VT fuse is in meters above ground level. If the VT value is lesser than 4m it will appear as a ground burst.
Note:
VT should miss the target while explode above the target and TIME should fire to the target while explode along the trajectory.
For example : If 200m is requested for VT the round will explode 200m above target and impact after meeting the ground. If Timed 200m is requested the round will explode in the projectile path where it meets the requested height.
- Delay
A delay fuse is similar to a quick fuse; however, it will wait several milliseconds before exploding once it has impacted. There are no parameters to specify with this fuse.
Orders for opening fire
The default order for opening fire is for the guns to fire when ready, once
they have received an execution order. However, the observer may choose to issue
an At My Command (AMC) or Time on Target (TOT) order at this stage.
If At My Command (AMC)is selected then the guns will not fire until they receive the command ‘Fire’ from the observer after the user has sent the execution information. This will remain in force until a ‘Cancel At My Command (AMC)’ command is given. Note that a ‘Cancel At My Command (AMC)’ command is not in itself an order to fire, but rather a cancelling of the At My Command (AMC) condition.
If Time on Target (TOT) is ordered, a text field will become enabled. Here, the user can enter the time that they require the rounds to land at the target. This time is based on the simulation timer which can be viewed in the simulation window.