
Sample Radio Net
The following steps will be used to create a radio net from the Radio Net Configurator.
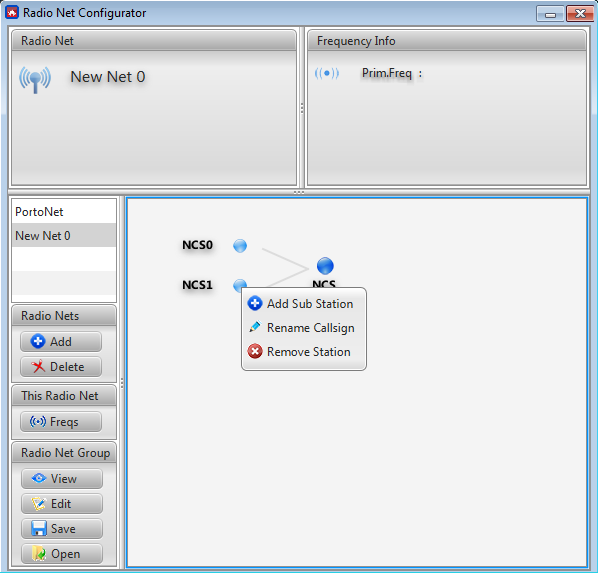
Step 1: Open the Radio Net Configurator.
Step 2: Click add button to add a new radio net.
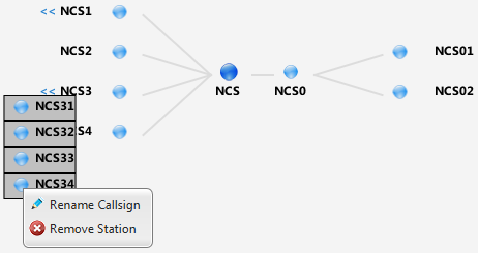
Step 3: Enter a name for the radio net and save. By right clicking on the root node the user can add stations or rename it. Right click on any node except the root node to rename it or remove it, or to add any sub stations to it.
Note:
A further level of Sub stations can be added to sub stations, these will be grouped together when displayed graphically. Hovering the mouse cursor above the grouped sub station node will display its added sub stations. These sub stations may also be right clicked to be rename or be removed.
∆ Image 17d.1: Radio Net Configurator |
∆ Image 17d.2: Radio Net Editor |
Step 4: Click “Freqs” button to add frequencies to the radio net.
Step 5: Add primary frequency value and alternate frequency value in the radio net frequency window, and then save.
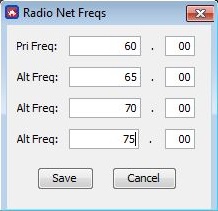
∆ Image 17d.3: Radio Net Freqs |
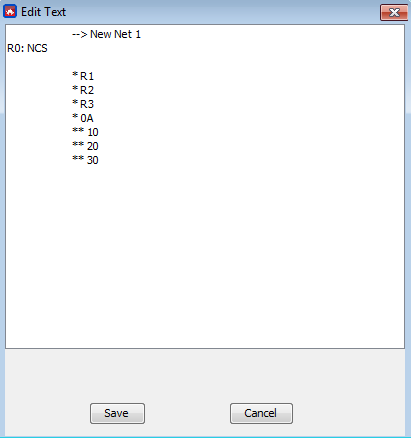
Step 6: Click “Edit” button and add callsigns for observers as follows;
0A
*R1
*R2
*R3
Step 7: Add callsigns for gunline as follows.
*R0
**10
**20
**30
Click “Save” button when done.
∆ Image 17d.4: Edit Text |
Step 8: Click the “View” button to view the added frequencies and call signs.
Step 9: Click the “Save” button and save as “radioNets.dat”.
Step 10: Click the “Open” button to open the created radio net.
Step 11: Click the “Edit” to edit the existing radio net.
Step 12: Click “Delete” button to delete the added or existing radio net.